Home >> Shaft Seals >> Oil Seals >>Seal Installation
Seal Installation
Seal installation might seem straightforward but when replacing seals (especially in the field) even the smallest of errors can lead to premature seal failure. Improper seal installation is recognized as one of the leading causes of seal failure; resulting in industry losing millions of dollars annually for unscheduled production downtime, installation time and clean up. The good news is that these seal failures can be dramatically reduced and/or eliminated by taking the time to follow the proper installation procedures.
“Sealed Right, Sealed Tight” – Daemar article from Kinecor Connections 2009
Technical Resources
1. Clean seal bore and shaft and remove all burrs and nicks.
2. Pre-lubricate the seal ID and shaft before installing the seal into the cavity. Use a pre-lube that is compatible with the system lubricant. The pre-lube will make the seal easier to install and prevent dry running during initial start-up.
3. Protect seal lip against damage from sharp keyways, splines and screw threads. This can be done by either taping the keyway, inserting an element into the keyway or using an assembly sleeve that fits over the shaft.
4. Point seal lip in correct direction and push to edge of the counterbore.
5. Slide the seal over the shaft to the seal housing. With finger pressure, start seal into housing with a slight rotating motion until seal has a light press fit in the housing. Be sure seal is square or perpendicular to the shaft. If the seal is crooked or cocked, continuing with installation will damage the seal.
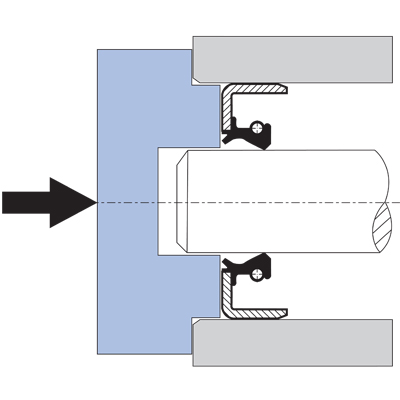
6. Finish installation by using a tool appropriate for your seal/housing configuration. Drive seal to final position. If using a plate, the plate diameter should be large enough so it contacts the face of seal housing. This will ensure seal is positioned straight and perpendicular to the shaft.
Counter Bore Installation
Seal is positioned square by seating against counter
bore.
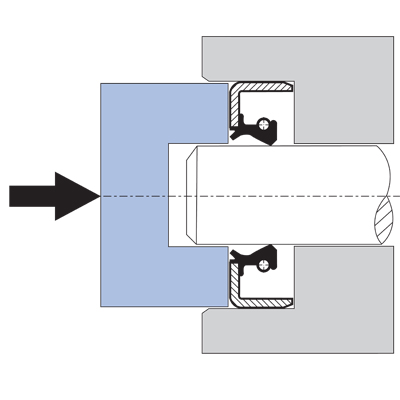
Counter Bore Installation – Flush Mount
Tool bottoms out against machined face of housing to
position seal.
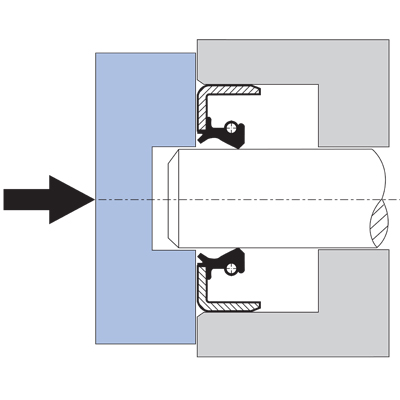
Through Bore – Recessed Installation
Tool bottoms out against end of shaft to position seal
in housing.
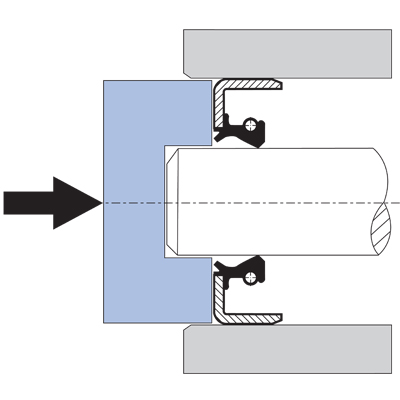
Through Bore – Tool Flush Installation
Tool bottoms out against machined face of housing to
position seal.
