Home >> Slide >> Dryslide Bushings >> Bushing Installation Guide
Bushing Installation Guide
FITTING METHODS
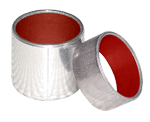
The Most commonly used method for fitting the bushing is to press them into the housing. Having created the correct housing (H7), the following steps should be taken:
- Chamfer the lead-in to the housing by 20°+/- 5° to a depth of 1-2mm
- Deburr and clean the mating surfaces
- Lubricate the outside surface of the bushing before fitting it (do not apply excessive lubricant as it may cause the bushing to move about when fitting in the housing)
- Check the alignment of the axes between the bushing and the housing
- Where several bushings are necessary, align the butt joints
- It is always advisable to use a guiding mandrel to insert the bushing in their housing
Press fitting is usually carried out using hydraulic, pneumatic or mechanical equipment (fig 1).
To fit bushings with a diameter or more than 55 mm, it is advisable to use a retaining ring with a diameter that is 0.3/0.4 mm larger (fig 2)
For flange bushings (fig. 3), the chamfer on the lead-in must have an angle of 45° and a depth of at least 2 mm (2.55 for a bushing with a wall thickness of 2.5 mm).
| Approximate Values of the Pressing | Force “F” in Newtons |
|---|---|
| Bushing Thickness 1 mm | F = 300 x L |
| Bushing Thickness 1.5 mm | F = 500 x L |
| Bushing Thickness 2 mm | F = 700 x L |
| Bushing Thickness 2.5 mm | F = 900 X L |
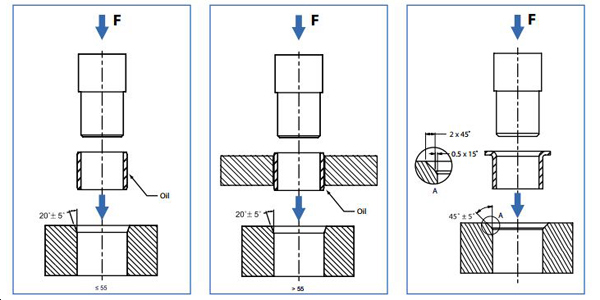
Figures 1,2,3


