Sealed Right, Sealed Tight
Proper installation procedures can reduce or even eliminate seal failures
As straightforward as seal installation procedures might appear to be, the smallest errors can lead to premature failures. This is particularly true in the field. The good news is that these failures can be dramatically reduced or even eliminated by following a few key steps.
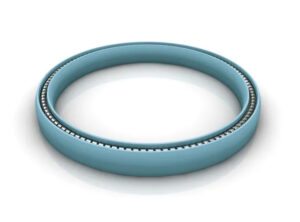
The entire installation process should always begin with a careful inspection of a new seal’s lip to identify the signs of damage or irregularities that will lead to leaks. The lip needs to be free of any nicks or tears and should not be folded back on itself. If a garter spring exists, it will need to be located in the related groove to ensure consistent contact with the shaft
The next step is to inspect the housing bore and shaft that will interface with the seal. The bore and shaft should be free from burrs and the grooves or scoring that may have been caused during operation when the old seal was in place. And the installation process will be further supported by the use of lead-in chamfers, the specific dimensions of which can be obtained from the supplier of the seal.
Installers also need to be careful to prevent damage to the sealing lip while aligning the seal with the shaft.
The protection of the lip begins by lubricating the sealing lip and the shaft with a “pre-lube”, which usually consists of the media that is being contained. The pre-lube protects the sealing lip by allowing the seal to slide easily on the shaft, and it prevents dry running conditions during the initial start-up process.
To prevent leaks that can occur during start-up, the new seal will also need to be oriented in the proper direction. The easiest way to determine the right direction is to note the orientation of the old seal as it is removed. Generally, the sealing lip will be pointing toward the side that contains the fluid to be retained.
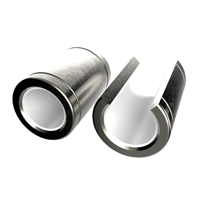
If the shaft incorporates features such as sharp keyways, splines and screw threads, a sleeve can be used to protect the sealing lip as the seal is installed over the shaft. And these sleeves can be lubricated on the outside to help avoid inversion of the lip.
The next objective is to ensure proper alignment since the misalignment of the seal, bore and shaft will severely shorten the life of a seal. Problems here can emerge in the form of uneven seal lip wear, the deformation of the lip that will cause the spring to pop out, and higher running temperatures between the shaft and seal lip that can cause the lip to harden and crack.
If the misalignment is very severe, the sealing lip will not be able to compensate and a leak will appear almost immediately after start-up.
A preventive maintenance program that includes all these procedures will keep equipment operating at an optimum level and reduce unscheduled maintenance expenses.
If it is sealed right, it will be sealed tight.

Seal installation guidelines
- Inspect sealing lip for tears and nicks
- Inspect the seal’s Outside Diameter for dents and scratches
- If the seal is spring-loaded, ensure the spring is properly seated in its groove
- Clean the seal bore and shaft and remove all burrs and nicks
- Pre-lubricate the seal’s Inside Diameter and shaft before installing the seal into the cavity. Use a pre-lube that is compatible with the system lubricant. The pre-lube will make the seal easier to install and prevent dry running during initial start-up
- Protect the seal’s lip against damage from sharp keyways, splines and screw threads. This can be done by using an assembly sleeve that fits over the shaft
- Point the seal lip in the correct direction and push it to the edge of the counter bore
- Slide the seal over the shaft to the seal housing. Using finger pressure, feed the seal into the housing with a slight rotating motion until a light press fit exists. Be sure the seal is square or perpendicular to the shaft to avoid damage to the seal
- Using a tool appropriate for the seal/housing configuration, drive the seal to the final position. If using a plate, the plate diameter should be large enough to contact the face of seal housing. This will ensure the seal is positioned straight and perpendicular to the shaft
- Conduct a final visual inspection to confirm the seal is properly seated